

How To Only Select The Color Image And Delete White Around It On Photoshop
What are the best means to remove white groundwork from a photo using adobe photoshop?
There are a ton of different ways,
Like:
- Remove Background Button
- Object Choice Tool
- Magic Wand tool
- Lasso style
- Pen tool
- Object Choice tool
- Using Blend Modes
- Using Channels
In this guide, nosotros'll show y'all the all-time 6 to employ.
Permit's offset from the quick and piece of cake to the more complicated methods, and we'll besides explicate the pro's & con'due south of each method
How to remove white background with photoshop Remove Background button
Harness photoshop AI capabilities
In Photoshop, the "Remove Groundwork" characteristic is a keen tool for removing white backgrounds from photos or any backgrounds for that matter.
Quick Note: Yous can simply employ this feature if you have Photoshop CC 2020 or a newer version. As such, if you are using an older version, you lot volition want to skip to the next option in the list.
the procedure of using this remove background method is extremely simple:
Pace one:
Select your image layer, unlock information technology if it's locked. but click on the lock icon to unlock information technology

Step 2:
Yardo up to your properties panel (if you don't see the properties panel but simply become to window > properties and that will bring this up for yous).
Pace 3:
In your backdrop console, click the "Remove Groundwork" pick (downwards under "quick actions).
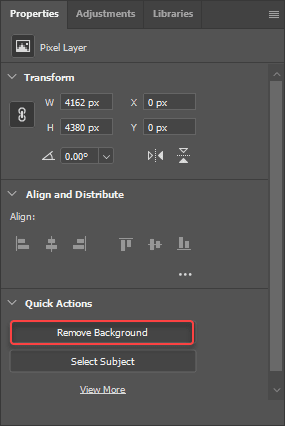
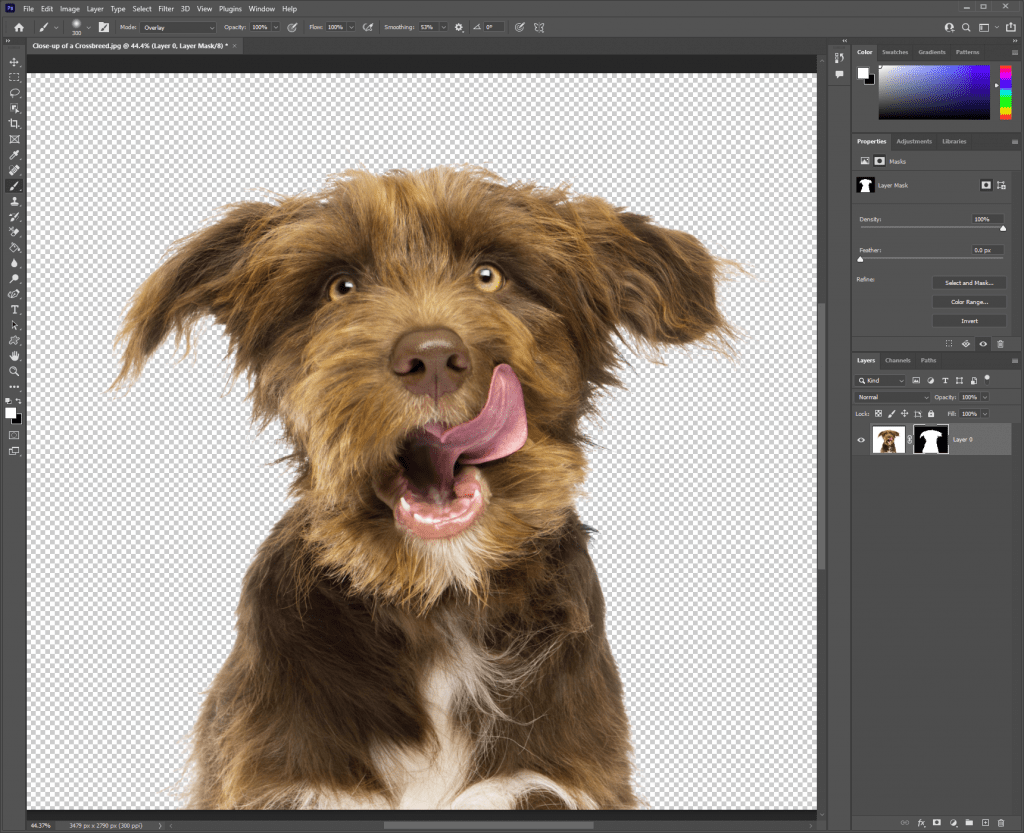
That'southward it, now photoshop will exercise its magic and will remove the white background.
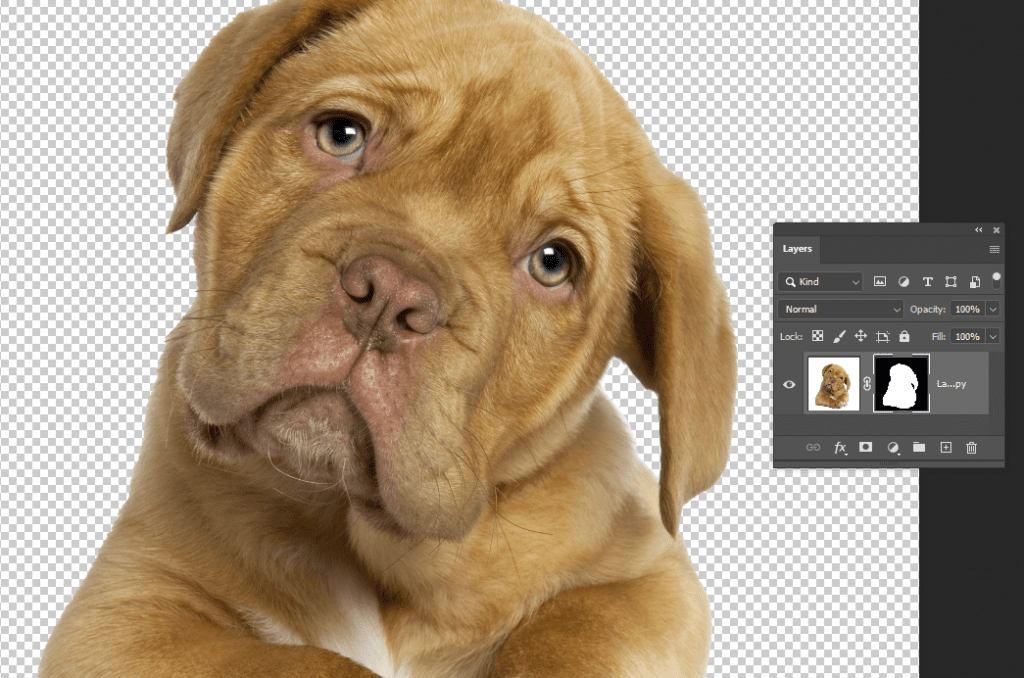
You volition find that a layer mask has been created around your subject field and everything looks really skilful.
That was literally one click, no manual settings needed, but one push. and that'due south why it's the quickest and easiest method.
How To Remove A White Background With The Object Pick Tool
Some other pretty new and awesome tool is the Object Selection Tool, it was updated in the 21.2.0 version, in this version Photoshop ameliorate the Select Subject.
this new tool is as easy as the "Remove Background" characteristic, and sometimes even do a better job in specific cases, so y'all have to give it a try.
Step i:
Choose the "Object Option Tool" on the right panel.

Step 2:
Click Select Subject area on the upper bar, or merely click on your subject.

Afterwards photoshop is finished selecting the object, just click on the Mask push button.
That'due south it, it's short and simple.
Remove a background manually.
How To Remove A White Background With The Magic Wand Tool
the magic wand tool basically works by creating a border around an paradigm or background and cutting it out.
merely it works all-time with a plain background or a high contrast background and is less good with complex edges.
Step ane:
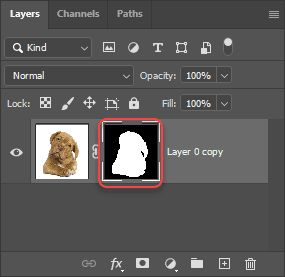
First, select the layer you lot want to remove the white background from (you can duplicate it if you lot don't want to ruin the original image).
Step 2:
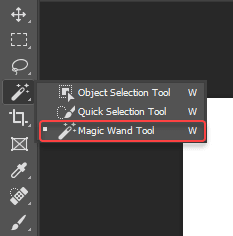
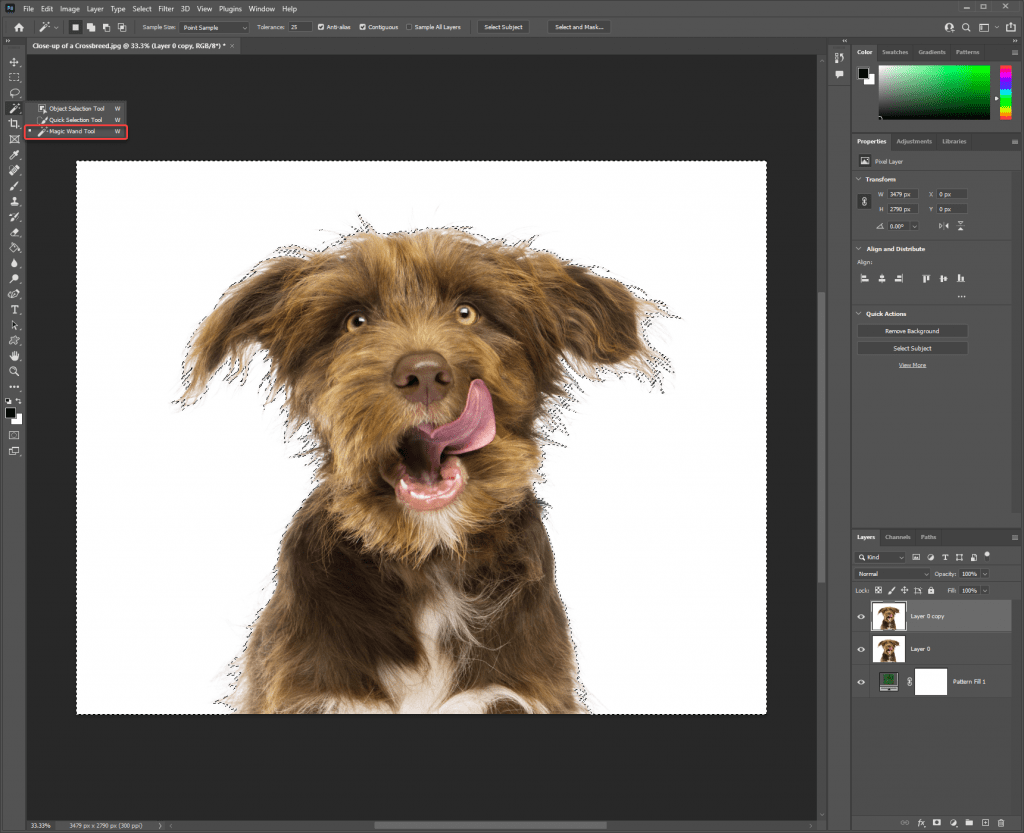
Select the Magic Wand Tool, utilise the shortcut "Due west". Or you can find it under the Quick Choice Tool.
Step 3:
Click on the background to select it, and if in that location is a good contrast it will do a proficient job. keep in mind to cheque if at that place are parts of the image background that it didn't catch, you tin add to the selection by pressing and holding the "Shift" key (yous will come across a "+" sign)
Pace 4:
To deselect parts of the background, you click and hold the "Alt" cardinal (you will see a "-" sign).
After you lot are happy with your selection, hitting the "Del" button and yous're done.
very like shooting fish in a barrel and fast but not then accurate.
Keep in listen that if you have delicate edges like hair, this tool is not a good selection because the selection is non perfect.
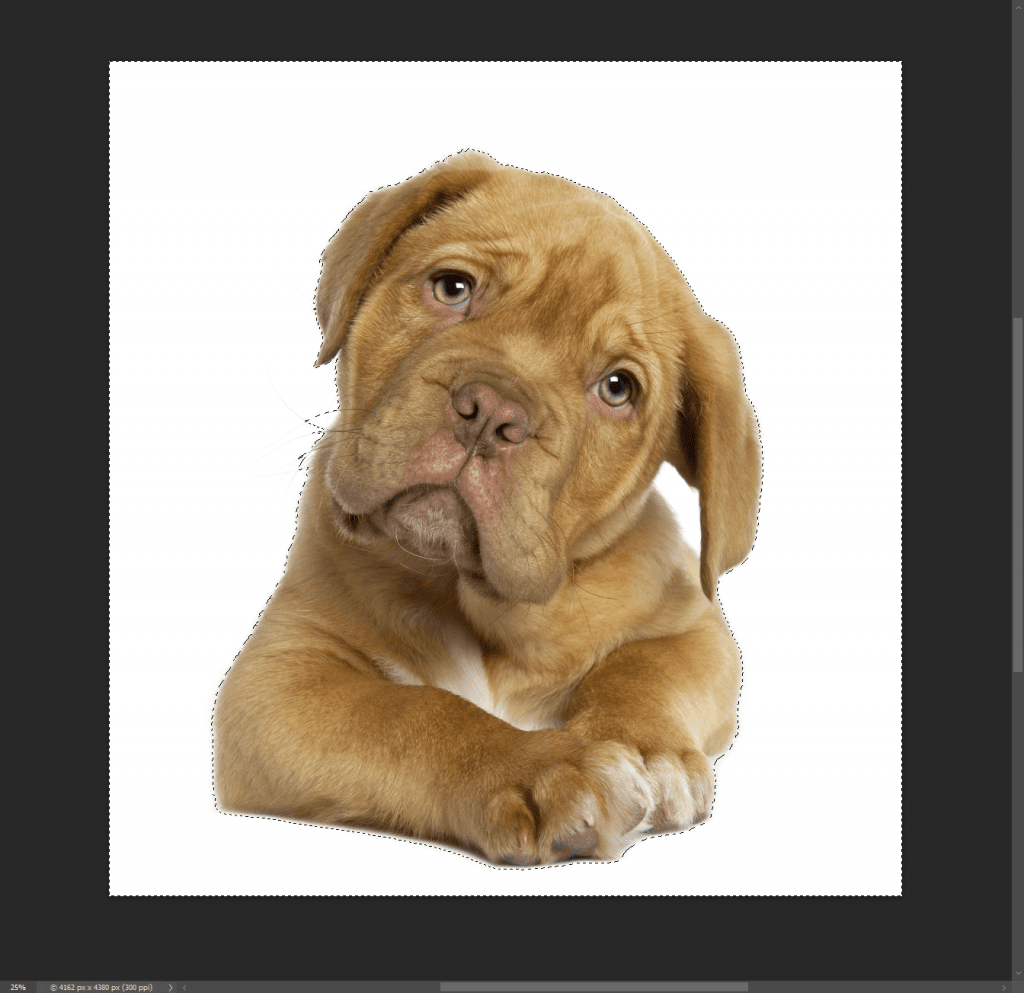
How To Remove A White Background Using Select Colour Range Tool
This method is good for a single-color flat logo.
Step one:
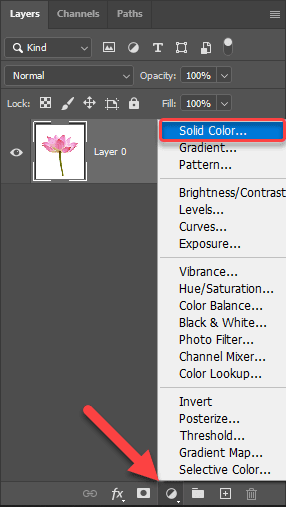
Go to Select > Colour Range

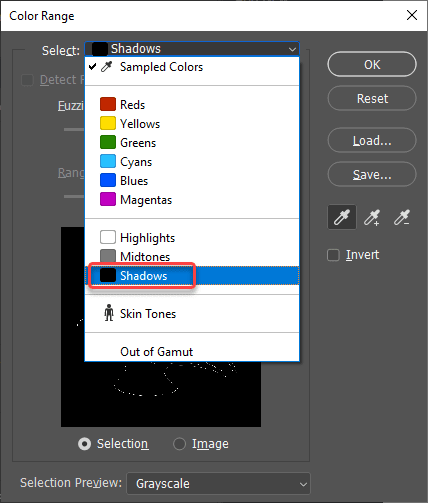
Step ii:
In the Color Range window, choose Shadows
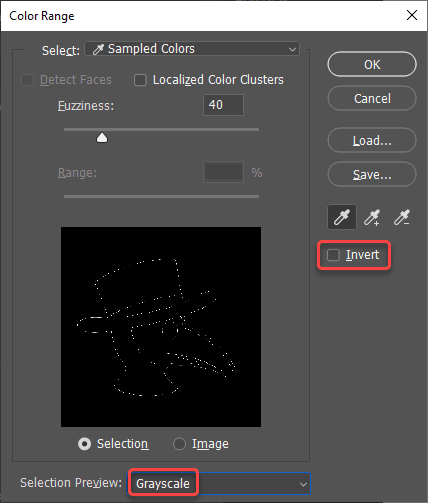
Step iii:
Set the Fuzziness and the Range as you lot see fit, make sure Invert is unchecked, and the selection preview is on Grayscale and hit OK.
Stride four:
Because information technology's a flat logo, create a Solid Colour Adjustment layer with the logo's colour-filled, and you tin delete the background layer.
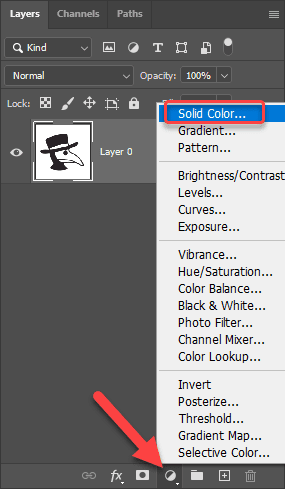
You lot only created A Solid Color Adjustment layer with that as a mask, and your logo is now filled with the color y'all picked with no white groundwork.
How To Remove A White Groundwork With The Background Eraser Tool
let's take a expect at the background eraser tool in Adobe Photoshop. this tool is very expert in situations where y'all have a white background or any solid background that is different from the image. for case, if you have a white background, but your subject is wearing white also, information technology won't work.
Step one:
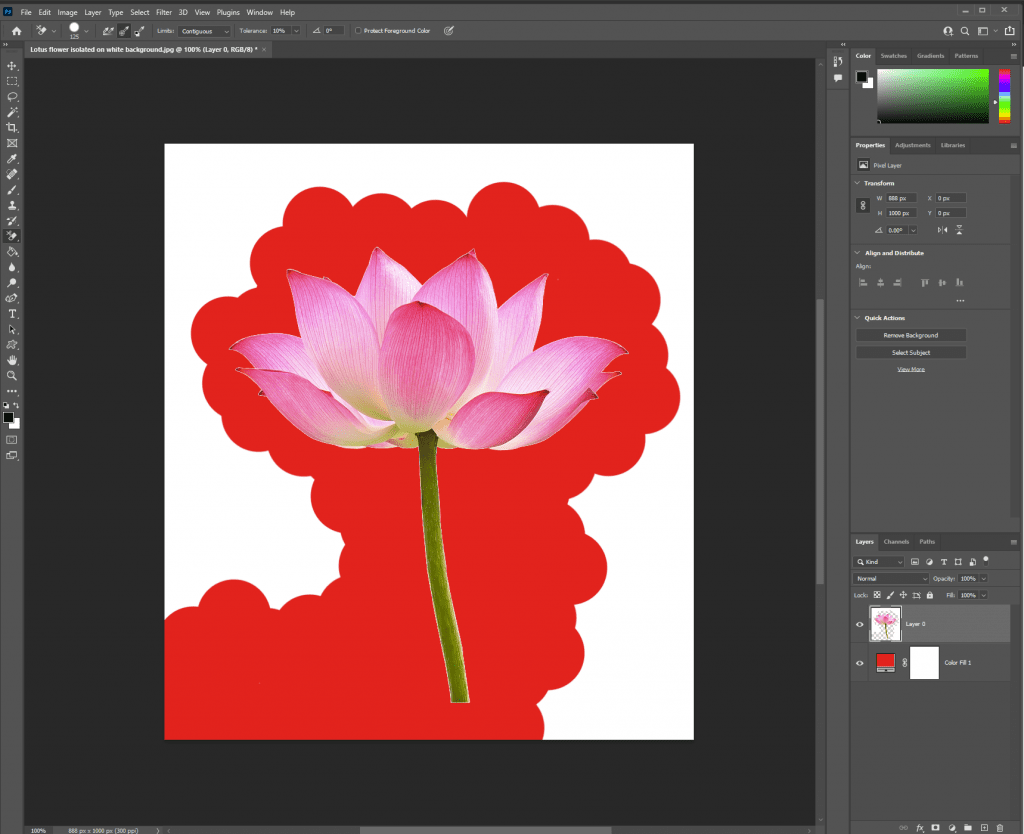
Let'due south create a solid (bright and contrast) colour layer to become references for our piece of work, and put it below the epitome layer, to ready information technology every bit a groundwork layer.
Stride ii:
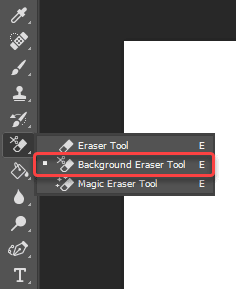
Now, to remove the background. go to the Eraser Tool and select the Background Eraser Tool by left-clicking and holding on the Eraser Tool.
Step 3:
On the height menu bar, you can see all the Background Eraser Tool settings.
Adjust the brush size brush by using the square brackets, the left foursquare subclass reduces the size, and the right square bracket increases the size.

Step 4:
side by side, to the right. cull the middle option, Sampling: Once. Because our background is pretty much one color or very close to one color. When nosotros sample this color we want to remove only this color, and we don't want to remove any other parts of the image. If yous select the other options like the Continuous Sampling, that will continuously sample from wherever you select. and information technology will cutting into your photo, and nosotros don't want that now.
Step 5:
Fix Limites to Contiguous
Step half dozen:
With the Tolerance, you volition need to experiment, recall about tolerance equally to how many colors you tin can tolerate. as well high will erase everything, and likewise low volition be very strict in what it cuts out. So, you need to observe something in the heart, try around 30%, and check your consequence (if the colors in the photograph are close to the background color, you will demand to reduce your tolerance (in this example we used 10%).
Step 7:
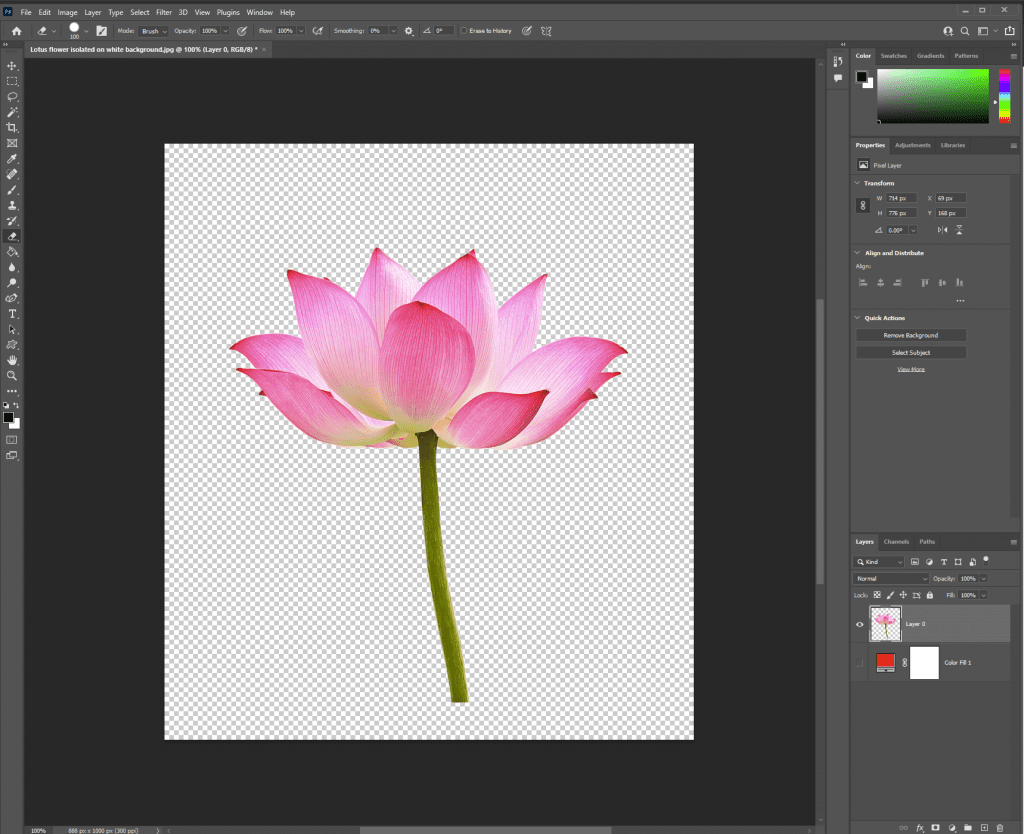
to start erasing, concord the left-click and start dragging it from the groundwork to set the colour sample on the groundwork and Yous can elevate over your paradigm, and in particular effectually the hair and the skin (you can zoom in equally you need to, and adjust the tolerance for dissimilar parts of the image).
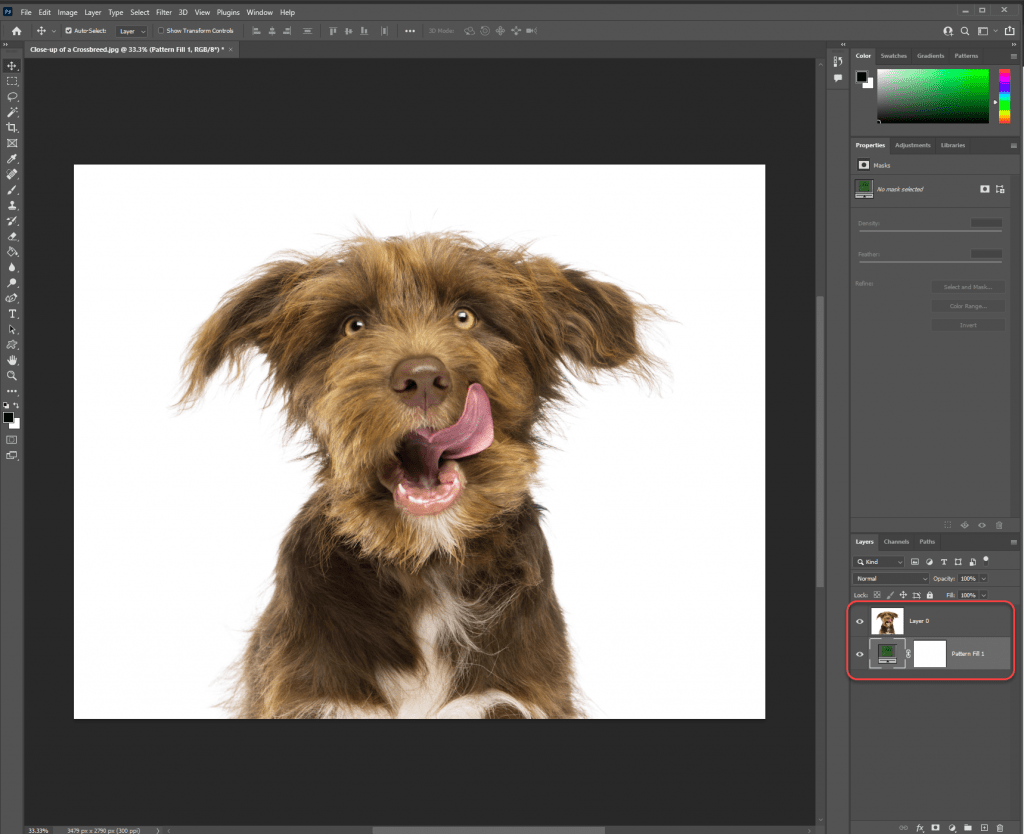
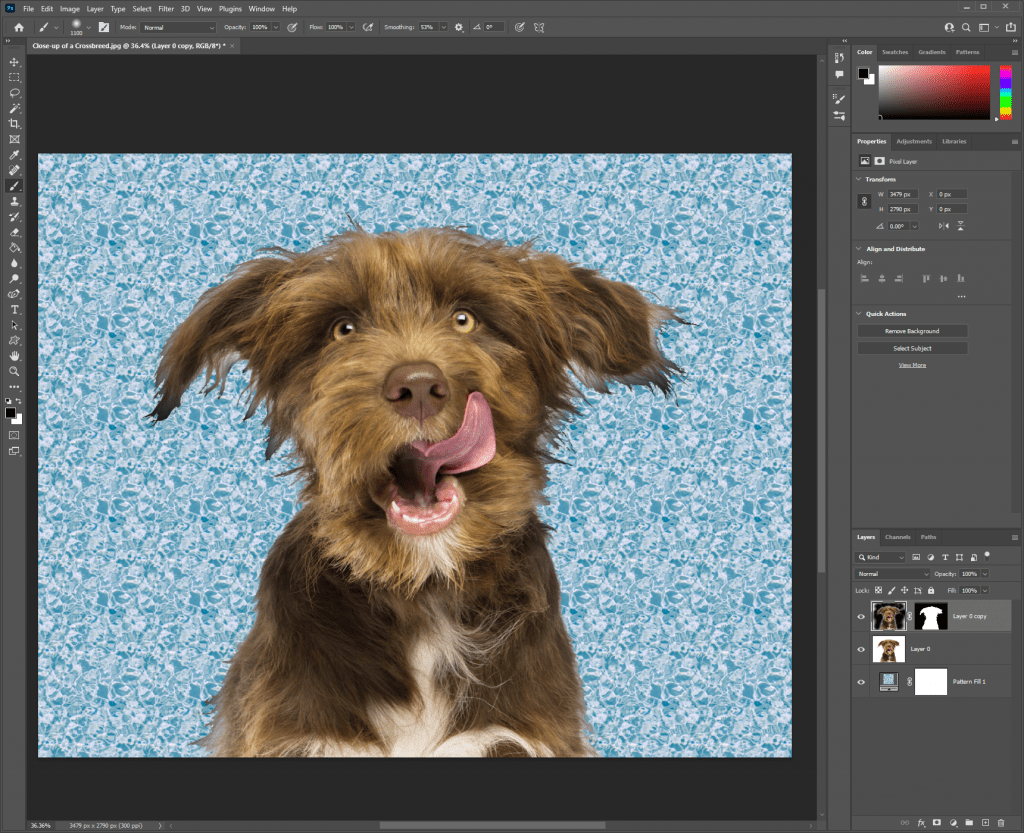
Remove White Background Using Blend Modes
using the blend modes method tin can exist very useful when yous will want to remove the white background from an epitome in order to replace the background with some other one, like some texture or anything else.
Keep in mind that it will not work well of the background texture has high contrast.
Stride 1:
to practise that, but add the texture you want to add as a new layer underneath the prototype layer. that way, when you erase the background, you will betrayal the texture.
Pace 2:
change the blending manner of the image layer from Normal to Multiply, and you will run across that the texture layer is composite underneath the whole paradigm, and non only the background.
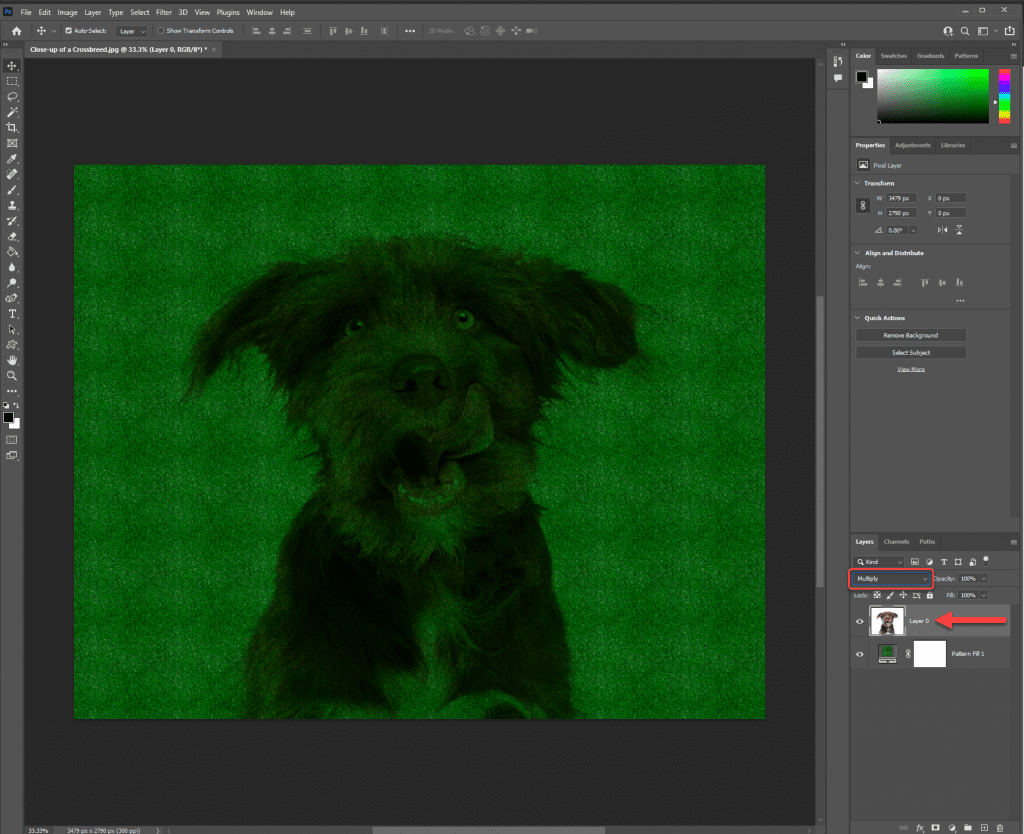
To fix that,
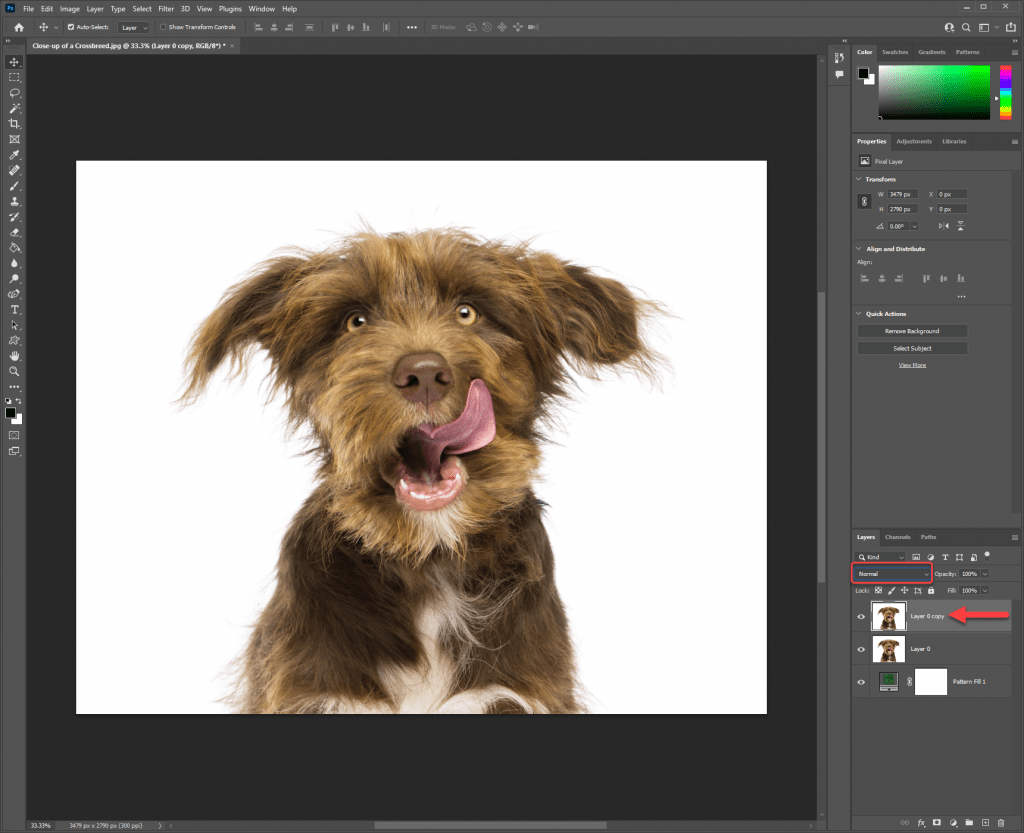
Pace 3:
Printing Ctrl or command J to make a copy of the image layer.
Step 4:
Change the blend fashion of that layer back from Multiply to Normal.
Pace five:
Use the Magic Wand Tool to select the white background area.
Step 6:
Afterward yous have selected all the white areas, hold the "Alt" (on Windows) or "Option" key (on Mac) and then click on the mask button.
Pace vii:
If you still come across areas with white background, take the Brush Tool, make sure it's a soft brush and the foreground color is blackness, and softly paint in the edges.
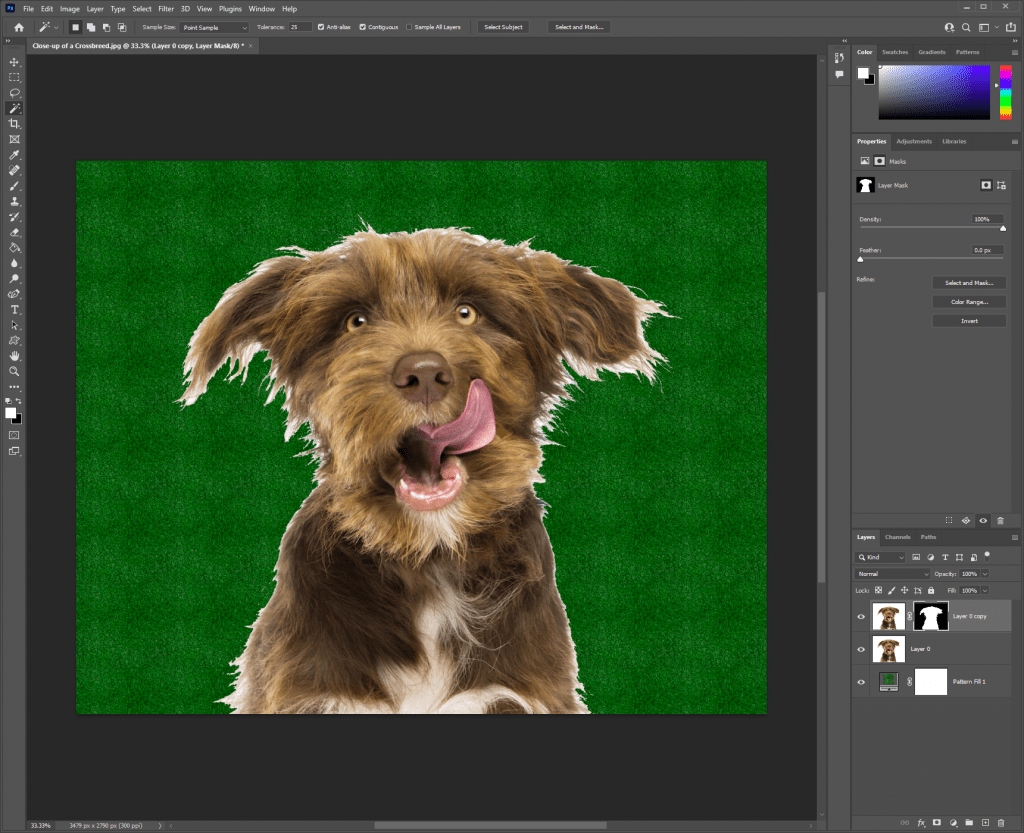
How To Remove A White Background With Channels In Photoshop
the channels method is a bit more complex, but yous'll get the best outcome when dealing with complex images like hair, fur, etc., where the edges are very gentle.
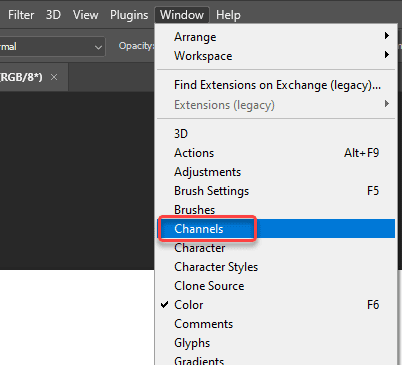
Step 1:
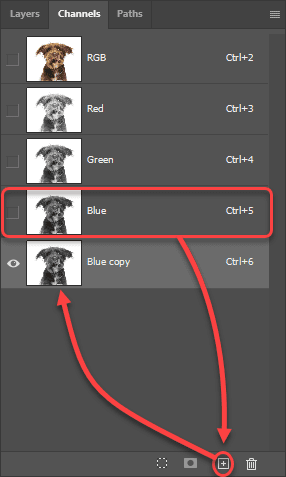
so, go to the Channels tab, if y'all can't observe it, become to Window > Channels
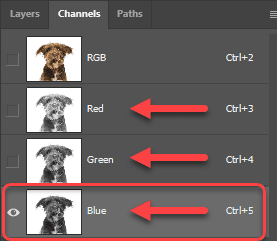
in the Channels tab, you lot'll run into below your image layer, three unlike color channels, red, green, and blue. also known every bit RGB, and what gives colors to your paradigm.
each channel will take different levels of contrast, based on your image colors.
Step 2:
choose the channel that has the near contrast, and indistinguishable information technology by dragging it down to the New Layer icon (nosotros will work on that duplicate layer in order not to ruin our image).
Notation: if you're seeing the different channels as colors (ruddy greenish and blue), and not in black and white, you need to make a change in the preferences by going to edit > preferences > interface. inside the interface make sure to uncheck the Show Chanelles In Color (under Options).
After you've found the channel with the almost contrast, drag it downwards to the new layer icon to create a indistinguishable.
Footstep 3:
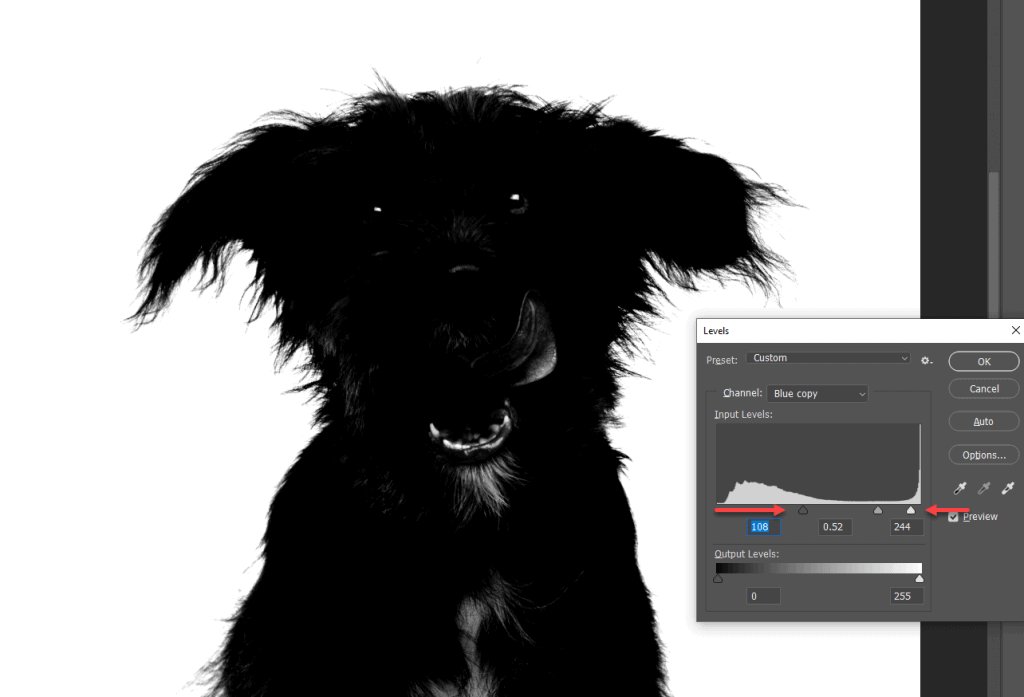
Next, you lot need to transform the image to black and white.
Go to Image > Adjustments > Levels, you can employ the keyboard shortcut Ctrl or command L, to open the Levels window.
Here, your job is to increase the contrast fifty-fifty more than and turn the image to be totally black and white. that way photoshop tin differentiate hands and create the best selection.
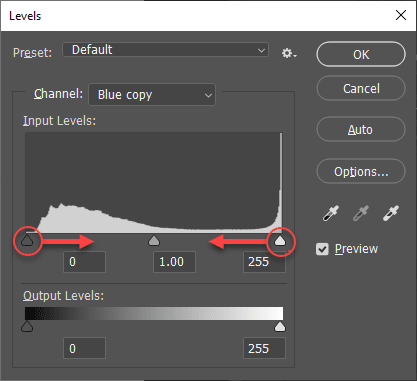
To do that, you need to take up the shadows and take up the highlights, and by the prototype, you will turn the subject completely black, and the background completely white (depends on the image, tin can be the other way around).
Keep an eye on the edges, don't go overboard and fry up the edges. observe the right balance, and press OK.
Step four:
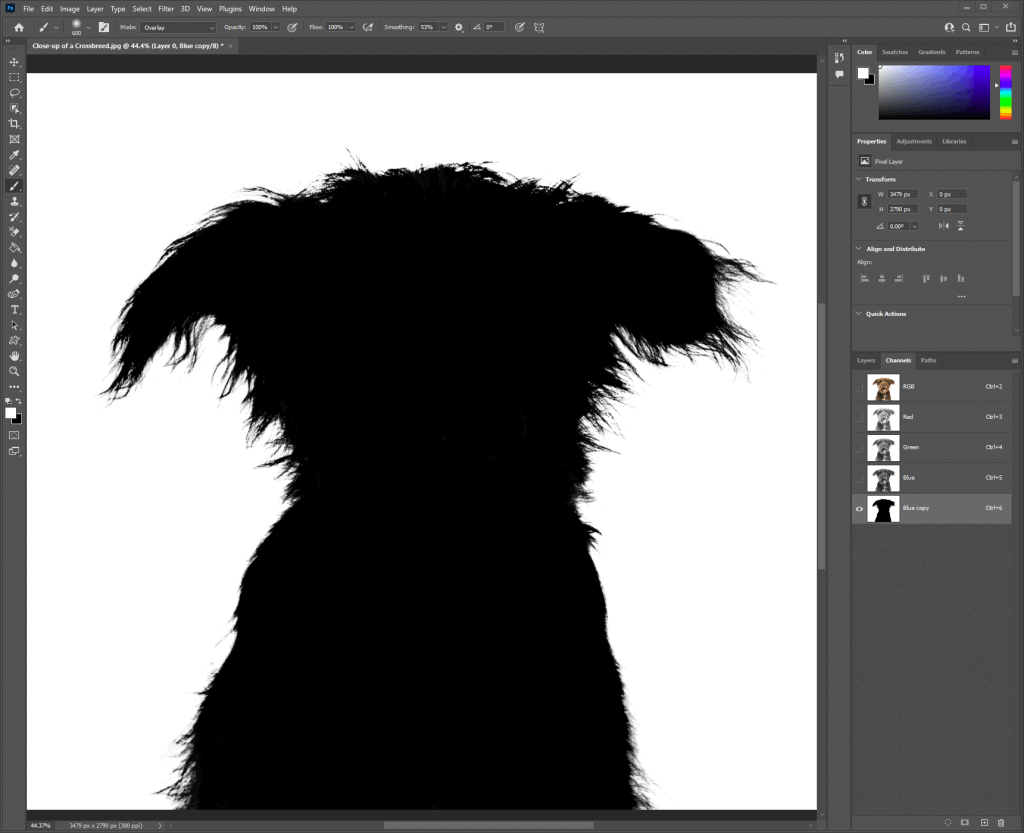
Take the Brush Tool (keyboard shortcut B), and ready the Mode to Overlay. Depending on your image, if the edges are darker, brand sure your foreground colour is gear up to black, and vice-versa, and go over the edges of your subject to arrive darker, and continue to fill in the residue of your subject and plow it to black.
if yous take left some white parts within your bailiwick (because they are white and the Brush Overlay Tool skip them, just change the Manner back to Normal and get over them to make them black also.
After you have finished with the black, turn your foreground color to white (keyboard shortcut Ten), and run over the background to plow it to white. Over again, starting from the outer edges.
Footstep 5:
Next, when finished turning the groundwork to white, and the subject to black, yous can create a selection.
Hold Ctrl or command and click on the layer that you lot worked on in the channels tab, information technology volition create a selection.
Pace 6:
Go dorsum to the Layer tab, and click on the Add together a Mask (if the Mask came the opposite of what you wanted, meaning, you come across the groundwork and don't see the bailiwick, just press Ctrl or command I to invert it).
Step seven:
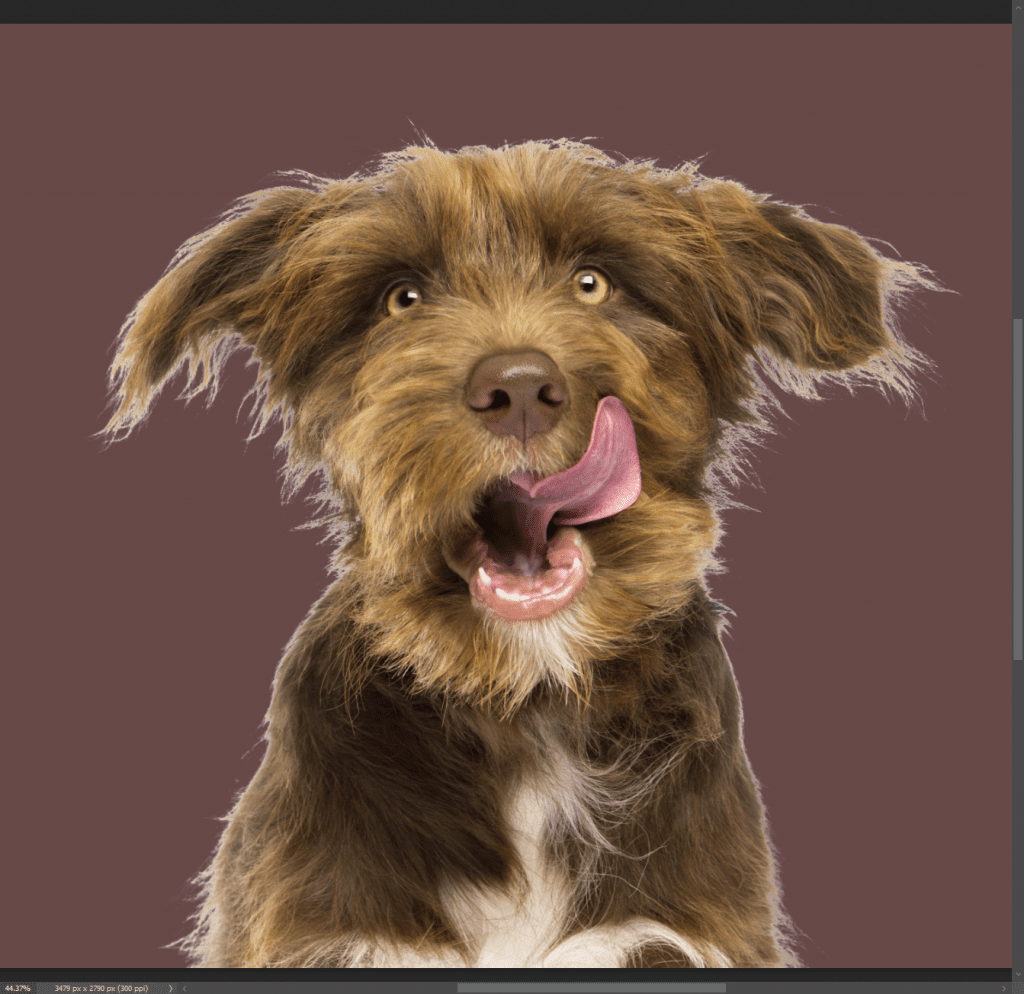
For The final part of the process, add a layer of solid background to come across how the fringing is looking and where you need to refine them.
So, add a new layer below the paradigm, and cheque to see the fringes with a few unlike colors ( because the fringes are not looking the same in each colour).
Stride viii:
To refine the fringes, double-click on the Layer mask thumbnail.
Select the Refine Border Brush Tool on the left panel, and so bank check off Smart Radius in the correct panel.
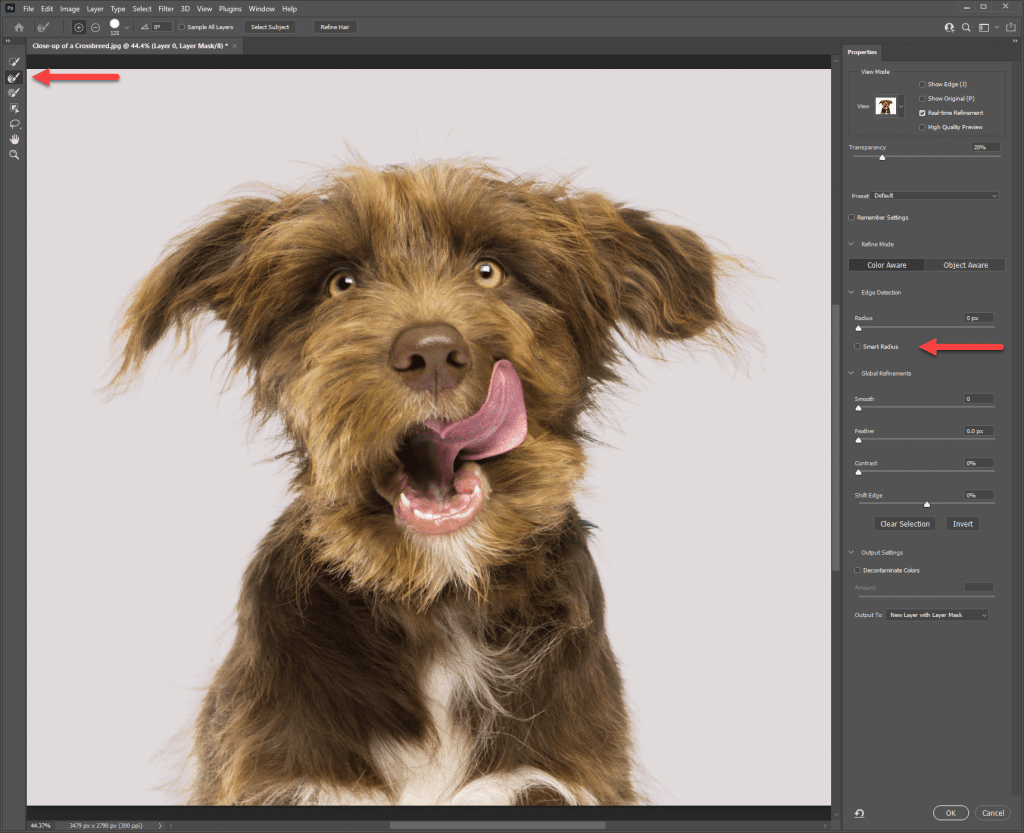
At present, Just paint along the edges to refine the fringing.
For the final touch, make certain to check the Decontaminate Colors to let Photoshop refine even more.

Hit the OK button and Photoshop will prepare information technology for y'all on a new layer, with a Layer Mask
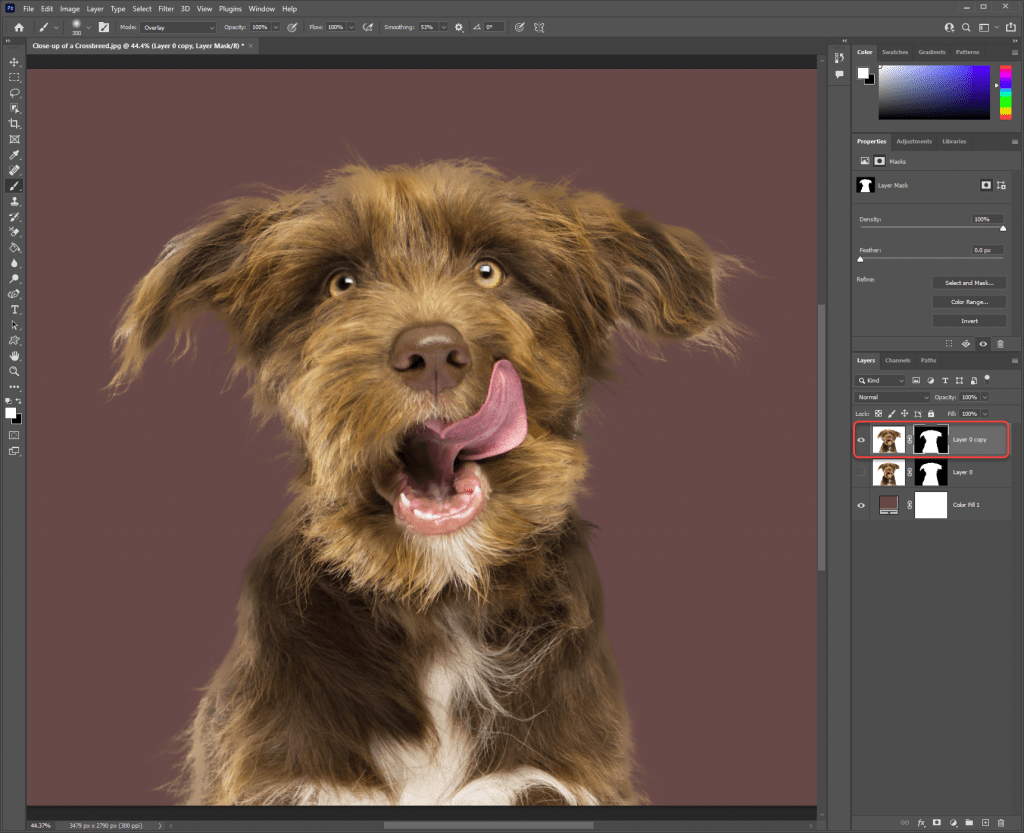
That's it!
How To Export Your Paradigm With A Transparent Background
After you've finished removing your white groundwork from your prototype, you will probably desire to utilize it with a transparent background.
To exercise that y'all need to save it in a PNG format because this format supports transparency.
In photoshop you accept a few options to exercise that:
- the "Save as…" option
- the "Quick Export equally PNG" option
- the "Consign as…" option
y'all tin employ whichever method you like, but each of them will have unlike functions related to it and so allow's first.
"Save as…" option
Get to File > Save as…
A new window will open for you to save the file, you'll have a lot of options like the selection to save the file format equally PSD for Photoshop, so you will be able to come back and edit it again with all the layers, filters, etc.
Choose the PNG type file, and click Save on the location of your choosing.
"Quick Export as PNG" option
Go to File > Export > Quick Export equally PNG
A new window volition open up for you to save the file, and information technology will automatically be as PNG type. yous do not need to change anything. Choose your file location and click Salve.
Export as…" option
Go to File > Export > Consign as…
A new window will open for y'all to save the file, here yous'll have an option to save it but as PNG, JPEG, or GIF format. Again, cull PNG, Merely here you have the option to change the Image Size, Color Space, and you can calibration the image size to be bigger or smaller (you can even do them both at the aforementioned time and export all of them together).
After you lot've set all your parameters (and chose the format to be PNG), click the Consign button, and a new window will open for you to save the file, choose your file location and click Save.
Source: https://photographertouch.com/remove-white-background-in-photoshop/
Posted by: brayackelvel89.blogspot.com
0 Response to "How To Only Select The Color Image And Delete White Around It On Photoshop"
Post a Comment